Wednesday, December 7, 2011

Thanksgiving Cherry Chocolate Chip

The holidays are always an interesting time when it comes to cheesecake. There are so many traditional desserts, that there is often no reason to make a cheesecake. However, in our family there are a couple of people that approach me before the holiday and say "are you making a cheesecake for Thanksgiving?", "can you please make a cheesecake for Thanksgiving?", and this year was no different.

Once the decision is made, it is a matter of figuring out which flavor to make. There is always pumpkin pie, so it seems silly to double up and make a pumpkin cheesecake, though I really like my pumpkin cheesecake and don't particularly like pumpkin pie, but I don't typically make cheesecake for myself, so that isn't a big part of my decision. In my wife's family, there is always a chocolate creme pie and a banana creme pie as well, so chocolate is out. This year I decided that I would like to make a chocolate cherry chip cheesecake. There are many choices to be made; do I want a cherry flavored cheesecake? or cherries in the cheesecake? or cherries on top of the cheesecake? For the last two options, do I want fresh cherries? frozen cherries? dried cherries? do I want a glaze of some kind on top? Then it comes to the chocolate. Do I want to use chips or chunks? What brand do I want to use? and so on.

In the end I decided on a regular cheesecake on a graham cracker crust with chocolate chunks (Scharffen Berger that I happened to find on clearance at a Big Lots or something!) and bits of frozen cherries, with those same frozen cherries covered in glaze on top.

I chose frozen cherries because they are cheaper than fresh cherries, and since most of them were cooking into a glaze, the softness of them wouldn't matter, and the rest were being cut into chunks. Also, when frozen fruits thaw, they tend to produce a lot of juice, and I wanted that juice for my glaze. Finally, I just didn't want to have to pit a ton of fresh cherries!

First things first, I thawed out my frozen cherries. I set some aside in a strainer so their juices would drain away. These would be cut up and put into the cheesecake batter, and for anything that goes into the batter, you want it as dry as possible. Otherwise the juices thin out the batter or cause inconsistencies inside the batter which can lead to cracks in the final cheesecake. After draining I cut them up into quarters and wicked away as much of the remaining juice as I could get with a paper towel.

I was using my standard plain cheesecake recipe, and when the base was complete I added my chocolate chunks and my cherries. I then poured it into the crust, put it in the oven and the long wait began.

The next step was to make my glaze. I have found that fruit glazes are pretty darn easy to make. Take some fruit juice, some sugar, maybe a little arrowroot or corn starch, put it over a medium heat, cook and stir. Let it start to simmer, but never let it get to a full rolling boil. What you don't want is for the sugar to get hot enough to get into the candy stages. Rather you want the starch to do its job and thicken the syrup. In this case I ended up with a beautiful dark red syrup with large soft cherries in it that tasted amazing. I put it in a bowl and got it in the fridge to chill down and thicken up some more.

My cheesecake had baked, cooled, been put in the fridge, and chilled overnight, and it was time to put the whole thing together. I find that most recipes tell you to run a knife around the edge of your cheesecake pan to loosen it from the sides. I find that you often cut into the sides of the cake doing this and the presentation is just that much worse, so I came up with a different way. I take a large kitchen towel and soak it with boiling water, then I wrap the towel around the edge of the pan and let the heat do the work! In a couple of minutes I can usually remove the pan without fear of damaging the cheesecake!

I removed the cake from the pan and put it onto a cake plate, then poured the cherry glaze onto the top. Unfortunately I had a bit too much, and it was not quite thick enough, so it soon started pouring over the sides of the cheesecake and soaking into the crust. It was no big deal though, as it still looked great.

Cherry glaze perches precariously along the edge!
I did find when we cut into the cheesecake, that the center was a tad bit soft. I had under cooked it slightly. Additionally, all of the cherries and chocolate chunks in the batter ended up at the very bottom, sitting on the crust. I would prefer that my additions are suspended throughout the batter, as I feel that would produce a better cake both from a visual and a consistency/taste perspective. The problem is that my batter is too liquid when I put it in the crust, and when I slam it on the counter a few times to remove the bubbles, all of the additions sink right to the bottom. My typical recipe originally called for sugar, but lately the recipe I've been using replaces the sugar with sweetened, condensed milk. I think next time I make a cheesecake I am going to go back to the sugar method and see if I don't get a slightly denser cheesecake, and somewhat sweeter too, as I found the condensed milk doesn't add as much "sweet" to the mix as sugar does.

That's all for now. I'm pretty sure I'll be making another holiday cheesecake for Christmas, so hopefully I can get another post up soon! What do you think of Ginger with a lemon curd?


Wednesday, November 23, 2011

4th of July Strawberry Short-Cheesecake!

Now that I'm free of the tethers of The Haven and commercial baking, with the occasional exception like the wedding in the previous post, my posts will primarily focus on the individual cheesecakes that I make for family and friend events. I hope that this more personal level of post will be enjoyable. Personally I like it better because I get to focus on developing flavors rather than the rigors of commercial baking in quantity.

Our friends Emily and Adam throw a 4th of July party every year, and as is typical with me, I wanted to take a cheesecake. I was trying to decide on which flavor of cheesecake I would like to take. When it isn't a requested flavor I prefer to try things that I haven't tried before... to experiment. In the past I had taken a "banana split" cheesecake to this party (banana cheesecake with I think an Oreo crust, and topped with strawberry, hot fudge, whipped cream, and nuts) and I wanted a fun, summer-y flavor for this time as well.

I decided to do a cheesecake interpretation of Strawberry Shortcake. I consulted my favorite source for recipes, the cookbook from Cook's Illustrated/America's Test Kitchen and found a good recipe for shortcake. I made the shortcake pressed into a 9" springform and baked it. It pulled away from the sides and had a domed top, but I cut the top off and it made a pretty good crust. I then made a crust-less vanilla-bean  cheesecake (this is my favorite and "signature" flavor) using my standard recipe. I sliced up a bunch of strawberries and sweetened them with raw sugar. Personally for berries I like the more caramel flavor of sugar in the raw to table sugar. I put a layer of sliced strawberries down on the shortcake crust, put the cheesecake on top of that, covered the top of the cheesecake with berries and the juice and finished it off by using the top of the shortbread that we had cut off as a topper!

Strawberry Short-Cheesecake
I think it turned out looking great and even better, everyone loved it! The slices we cut were a little much, but I think that by spooning more berries on top and adding some whipped cream (sorry, I cheated and used a can!) it balanced everything out. Once again, most of the plates were left nice and clean !

I'll try to keep up the cheesecake tips as much as I can. In this case I have a tip that pertains to this story. When the shortbread came out of the oven I noted that it had pulled away from the sides of the pan, making it slightly smaller than the cheesecake round that would go on top of it. Some may have wanted to re-bake it or something, but when making a cheesecake in pieces, things like this are going to happen, and in the end as you can see, it looks just fine. Actually, the slight differences in the sizes made it look a bit more rustic and home-made which I think is perfect for the 4th of July!

Tonight I'm baking up my cheesecake for Thanksgiving so stay tuned for the next post!

And I'm back!

So, it's been a while since I posted here. This is primarily because I am no longer part-owner of The Haven as I once was. The Haven failed and we had to close it down. I miss the chance to constantly experiment with cheesecake flavors and come up with new and exciting things, but I don't miss the long hours, lost weekends, and the crazy people we were partners with.

Just to catch up, I make far fewer cheesecakes now than then obviously. I pretty much just make them for friends, family, and special events. In fact, I was supposed to make one for a Halloween party, but we ended up taking other things instead.

I did have one story to tell that kind of bridges the gap between business and family. I made cheesecakes for my cousin's wedding. I had to serve 200-300 people. It was a lot of work.

Becky came to me when she first got engaged and said that instead of a regular wedding cake, she wanted cheesecakes. She asked if I would be ok with making them for her. I of course said yes. Then she told me that there would be 200-300 people at this wedding! Eventually we got around to discussing flavors, and display. I offered to do cheesecakes but then cover them in fondant and make it look like a regular wedding cake, but she said that she was ok with individual cakes, so that's what I did. We decided on two flavors, chocolate chip and white chocolate raspberry, and I was making a total of thirty-one, as I also did a groom's cake in a different flavor (caramel).

The logistics were rough. I had to get ingredients, I had to have the time, and I had to have the storage space. Luckily for the ingredients I still have the Restaurant Depot membership card that we had with The Haven, so I was able to get all of the ingredients for a pretty reasonable price, and all in one trip! As for the time, with the wedding on a Saturday I took off the two days prior to the wedding. Storage space was a little harder to come by, but my in-laws had an extra fridge in their garage, so we emptied it out completely and were able to stack right around twenty to twenty-four cheesecakes in there. If we had proper boxes that weren't two times taller than necessary, then I would have been able to fit them all... but proper boxes were WAY too expensive.

Another piece of logistics was the timing involved in actually baking these things. When the Haven folded we took the counter-top convection oven that I had used there, and combined with my oven at home I could bake upwards of eight to ten at a time. However, as I found at the Haven, the most I could comfortably mix at the time was three. So I did them in batches of three in each oven. Mix three, put them in the oven, mix another three, put them in the other oven. Clean up and wait, then repeat. In this manner I was able to get eighteen made the first day, and had plenty of time for the remaining twelve plus the groom's cake... and honestly, I messed up the groom's cake on the first run so I had to make a second one. They were all made in time, and they were all in cold storage until the big day.

Delivery and transport weren't too tough, except that we had to do it between the wedding (which we were attending) and the reception (which we were also attending) and it made us stress out a bit. We have an SUV, so we drove from the wedding to our house, picked some up, then to the in-law's house and picked up the rest. Luckily the wedding, reception, our house, and the in-law's house were all within ten minutes of each other! We got to the reception and started carrying in box after box containing cheesecake and in the end it wasn't too bad. We were done with the three best looking ones set up on the cake table and the rest in the kitchen with a lot of time to spare before the wedding party even showed up.

The end of this story is kind of sad and kind of happy at the same time. First, the groom barely got to taste his cheesecake as he wasn't feeling very good. The bride did have a bite or two, but all of that is understandable. They had a lot going on after all! After all the guests were served I asked one of the servers how much was left and she said "lots." I decided to check it out and in the end they had served roughly ten to twelve of the cheesecakes which means they had eighteen left over. I made sure that the bride's mother took one home for the bride and groom, and one for herself. We took two of them home, and the in-laws got one or two. After that we let the other guests take one if they wanted and the staff as well got to dig in. (We also took one of the bottles of champagne that they had opened but didn't need!) So, sad because we made WAY too much cheesecake, and happy because a lot of people were able to take the extras home!

In the end it was a fun experience. If I ever have to make cheesecake for a large group like that again, I would definitely do it in smaller quantities. I was just happy that we had the means and ability to pull it off, and since we were just family making food for family (and not selling it at all) we didn't have to worry about the laws regarding commercial kitchens or anything. Everyone seemed to enjoy it and had a great time.


Monday, September 13, 2010

Rough Week

Last week was not the best one on the books. The cheesecakes didn't sell very well for the first half of the week, or over the previous weekend, but I knew that I needed to stock up for the weekend since it was Stagecoach Days in the wonderful city of Banning, CA. Saturday morning was the city parade, it started right outside our door, and it was two hours long! Our new menus just got printed, and it was a great opportunity to market ourselves to people that may or may not have known we even existed. But let's get back to the cheesecake.

By Wednesday night I had most of a peanut butter, about three quarters of a chocolate, and maybe half of a vanilla bean cheesecake in the case. I think we have determined that the Chocolate Truffle is a best seller, so I am going to try and have that, along with my signature Vanilla Bean all the time. Then I can rotate in a new flavor as needed, about every week or so. This will help in many respects, as we can stock up on supplies for the constant flavors, and just pick up the few items needed for the one new flavor each week.

Thursday was my baking night this week, and for another Haven Cafe related issue, I took off from my regular job at noon and headed for home. We had our meeting (which turned out to be a pretty big waste of time) and it all went downhill from there. When we got back I hit the grocery stores, as I was going to bake Pumpkin Cheesecake! The goal is to let people know that we have it, and that we are taking orders for "your holiday cheesecake" so that maybe we get some additional business that way. I went to 4 stores, and at one of them I find this on the shelf:


That's right. No pumpkin. Anywhere. Now what? It turns out that an overly rainy season, coupled with a late harvest has left the pumpkin grower with a massive shortage. Nobody in the country has canned pumpkin! Between shopping and getting back to the Haven, I have decided to make a batch of vanilla bean, and we can keep the peanut butter in the case another day. I would go back on Friday night and make... well, whatever flavor I could figure out. I get moving on the Vanilla Bean cheesecakes, and for some reason I was just off my game. At around 8 I had just pulled the crusts out of the oven and was getting started on the batter... and around 8:30 I go to pour my first two into the crust, and I could see big chunks of unmixed cream cheese pouring into the bowls! I was wrecked. I couldn't use them. I had to dump two whole cheesecakes worth of batter and crust... and it was nearly 9 at that point. If I were to get the other 2 into the oven by 9:30, they take about 50 minutes to bake, and another 3-4 hours to cool before being able to stick them in the fridge... well, I wouldn't have gotten home until 1:30 or 2! I decided to call it a night. I wrapped the 2 unused crusts, cleaned up and headed home. It was not a good day.


Friday however, was better. I had decided to do mint-chip cheesecake, so I made sure I had what I needed in the morning before work, and I was going to head straight to the Haven to get going on them. However, around 4:30 I get a photo in my text from my wonderful wife Jan. It's a can of Pumpkin! Farmer's Market Organic Pumpkin to be exact. She bought the store out which sounds worse than it is, as they only had 6 cans. But at least we know it's out there!

Despite a couple of things that set me back an hour or so, I finally got the pumpkin cheesecakes in the oven. Much to my chagrin, I found out that I really need to be more in tune with my oven. The batter for the pumpkin cheesecake is thinner than that of any of my other flavors, and there's more of it. As a result I needed to cook them at a lower temperature, for a longer period of time. I could tell this was the problem because at one point they started to rise. Cheesecake when cooked properly doesn't rise. In fact the top should be perfectly flat. They rise when the temperature is too hot, causing the liquid in them to turn to steam, thus the cheesecake inflates as this steam attempts escape. This essentially means that the cheesecake is full of hot air, and as such, when the oven gets turned off, they cool off, and the tops sink right back down, lower than they were when they started. It also causes things like cracks to appear in the top. Fortunately the taste and texture were still good, so we could actually serve them.


I went back Saturday morning and busted out two vanilla bean cheesecakes. By noon those would be in the case as well, and we would be fully stocked on cheesecake... but I had about four slices of peanut butter cheesecake that was taking up my room... what to do? I didn't want to waste it, so instead I cut the edges and crust off of it, balled it up and dipped it in chocolate! Oh, and I put them on a stick! Peanut Butter Cheesecake Truffles! I made twelve truffles out of those four slices, and by the end of the night I was down to only three! So a cheesecake that sold maybe two slices in three days is suddenly gone! That's my kind of business!


The week wasn't that great, but it ended on a high note, and now I know exactly what to do with a cheesecake that won't sell. So let me leave you with a tip for this week.

I mentioned last time that I had two "not my cheesecake" tips, and here's the second one. If you aren't going to take the time and effort to do it right, then it would be better not to do it at all. I heeded this advice on Thursday, and when my batter came out lumpy, I dumped it and moved on rather than attempting to save a buck and serve an inferior product. Here is how this is a "not my cheesecake" story. Not too long ago, my wife and I went out to a fancy restaurant. We had the Chef's tasting menu. Despite a rocky start that lead to some free wine, the meal itself was pretty good. Then came the dessert. It was a trio of various desserts, including a cheesecake. I cannot remember what flavor it was, but it had an interesting kumquat sauce on it that was pretty good. The cheesecake however was not very good at all. It was a non-white batter which turned out to be a bad thing, because as we cut into it, we could see many chunks of white! These were bits of cream cheese that didn't get mixed properly into the rest of the batter! I'm sorry, but this is unacceptable to a cheesecake guy like myself. I don't know if the chef knows how to make cheesecake or not. Anyone can follow any recipe that they want, but unless you know certain techniques, then things will go wrong, and unfortunately for that chef, solid bits of cream cheese were left suspended in his batter. All it takes is doing things in the proper order, and for the proper amount of time, but since this chef (or maybe his souse chef) didn't take that time or effort, and as a result what he served was inedible.

Friday, September 3, 2010

Settling In

In every situation you eventually fall into a pattern. My first week of making cheesecakes for The Haven Cafe was not a pattern. It was a scramble to get product onto the shelf. There are many things that need to be accounted for before you can get into your pattern. In fact, if all goes well, that pattern is constantly shifting to accommodate more and more customers who want more and more cheesecake.

Our initial batch was 3 cheesecakes, only 2 of which were sellable. Then through the week I added more of those flavors, and finally for the weekend I added a 3rd flavor. In each instance I had 2 of each flavor, except that last one where I had 4. And they sold well! So well that I came in on the day we were closed and made a batch of 4 vanilla bean cheesecakes as well as 4 of a new flavor for the week... peanut butter! (Perhaps when I get a chance, I'll embellish on the creation of new flavors a bit more in another post.)

But the week has rolled by and very little cheesecake has sold. At some point I am going to have to tell them to sell them at a discount, and eventually (cheesecake can last a bit over a week in a fridge) we will have to toss what doesn't sell. But what does that do to my pattern? I had planned on coming into The Haven Cafe on one night during the week, then the 2 nights of the weekend that my wife and I work anyway. In each of those nights I would make a batch of 4 cheesecakes. In the case of this week however, since we didn't sell out of a single flavor, including the Key Lime that had less than a whole cheesecake left as of Sunday afternoon, I didn't go in during the week, and it remains to be seen if I will have to make cheesecake tonight or tomorrow. As I said, I will have to replace anything older than a week old, so that means that I will have to at least bake something this weekend... but I doubt I will bother with making 4 at a time any more. I suppose I will do batches of 2 until business picks up.

In the end you have to remain optimistic and you have to remain open to the flow of product. I'm sure that at some point in the future, they will be selling so much cheesecake that I will have to go in every night to stock up for the next day... maybe at that point we will be making enough money that I can quit my day job and exclusively make cheesecake for a living! Hey, a guy can dream can't he!

This pattern that I talk about applies to my Blog posts as well. My initial three posts came in the first week, but that was when things were exciting and new. The adventure was fresh. But as with everything we settle into a pattern. I am going to try and post at least one blog a week, and I hope to be able to do so, but as you can probably imagine, being a full time traffic engineer, as well as a nearly full time baker/restaurant owner, I don't have a whole lot of extra time to spend writing. I will try my best, and in the end I do it for the readers. I hope that you get something out of it, and please post comments to let me know what you like and don't like, what you would like to read about more, etc...

With that said, what flavor should I add to the lineup for next week? I'm thinking mint-chocolate chip... any other suggestions?

Cheesecake Tip for the week:

I have two tips that are related to experiences that I have had with cheesecakes that are not my own, and the tip related to the most recent one is this: Sweeten your cheesecake. It seems intuitive that a dessert should be sweet, but apparently not. The most recent cheesecake that I had was at a mid-to-upscale steak house. It was an apricot cheesecake, and I got the distinct impression that the only sweetener (or flavoring of any kind) was apricot juice or puree. I could definitely taste the apricot, but the flavor of unsweetened cream cheese greatly overpowered any other flavors involved. Please, make your cheesecakes sweet. You can taste the batter before you bake it, and the flavor there is just a little different than the final product. You can certainly tell if the taste of unsweetened cream cheese is overpowering something as delicate as apricot. I'll post my other "not my cheesecake" tip in my next blog, so stay tuned!

This just in! Tomorrow is International Bacon Day!!! I may have to look into a bacon cheesecake! Hmm... how about a slice of bacon and sundried tomato cheesecake on a bed of romaine lettuce with fresh croutons and a garlic vinaigrette?

Friday, August 27, 2010

The Swing of Things

It is Wednesday evening. I wanted to head into The Haven Cafe to start stocking up the dessert case for the weekend. When I arrived I found that only two or three pieces of my original 2 cheesecakes were left! It was a good thing that I came to make cheesecake otherwise they wouldn't have much for Thursday!

Once we get into the swing of things, we plan on having 3 cheesecake flavors at all times. One of those will always be the vanilla bean, and the other two will be whatever I feel like making for that week. Hopefully I can settle into a groove, bust out all my cheesecakes over the weekend and then not have to come in during the week. We'll see how that goes, but in the meantime, as I figure out all of the intricacies of this kitchen, it looks like I'm coming in whenever I get time to bake, and/or if they are running low on stock.
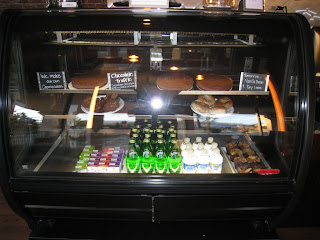
The Display is full-o-chocolate truffle!
It was time to add the third flavor for this week, chocolate truffle. My eight inch spring form pans arrived and though they were a bit taller than I was expecting, I was able to figure out a shelf configuration in the oven that would fit 4 cheesecakes and a water bath. I cranked up the heat and got to work.

One of the issues I have in this experience is adapting my recipes to the smaller pans that I am using, but also adjusting for quantity as well. I typically make a single nine inch cheesecake, and now I am making four eight inch cheesecakes! The engineer in me wants to apply a simple ratio to determine exact amounts of each ingredient... but it isn't quite that simple. 4 x (8/9) x the quantity of ingredient. This would be the formula I would use if I were taking that route. Four is the total number of cheesecakes, and 8/9 is the ratio of pan sizes. This formula tells me that when I typically use 24 oz. of cream cheese, I now need to use 85.3 oz. of cream cheese. But it also tells me that when I use 3 eggs, I now have to use 10.67 eggs. I personally don't want to mess with fractions of eggs and for that reason this method is out. I had to keep it simple,and since eggs are the one thing I can't easily divide into fractions, that would be my defining quantity for the ratio needed.. Since I typically used three eggs for one cheesecake, and I had to decrease the volume, I would now use two eggs for one, meaning eight eggs for all four cheesecakes in each batch. The new formula is 4 x (2/3) x the quanitity of ingredient. This gives me the amount of cream cheese to use, as well as all of the other ingredients which are easily scalable.

With the batter mixed and poured, I slid all of the cheesecakes into the oven. Four cheesecakes crammed into this small oven was tight. I was going to have to rotate these part way through baking. Ovens are hotter at their walls than in the cavity, particularly if you are opening and closing the door. If you can't place your baked good in the center of the cavity, but don't rotate it part way through the baking process, then the parts closest to the walls of the oven will cook faster. To avoid this you have to rotate the items part way through the baking time. Baking time is another thing that has to scale based on variables when baking a cheesecake. I bakes a typical nine inch at 300 degrees for about an hour. I was baking four eight inch cheesecakes at 250 degrees, so I figured that it would be roughly the same time frame, but I like to be cautious so I set a timer for 20 minutes to rotate them. At that time they seemed like they were setting well. After rotating I left them in for another 15 minutes and they were set very well, probably a little overdone actually.

As I was rotating I noticed that two of the cheesecakes had water on top of them. To get everything to fit I had to put the water bath on the top rack above the cheesecakes. In addition to that the oven itself isn't level. So the two cheesecakes on the downhill side got some liquid on top of them when the oven shook... which was every time that the oven door opened. Fortunately when set, cheesecake can handle some water and it evaporated before causing any problems.

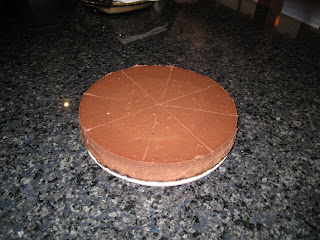
Chocolate Truffle Cheesecake
I learned a lot of lessons during this baking session. First, level the oven. Second, it will take some time, but eventually I will figure out an optimum timing and temperature for baking in this environment. Third, I have to get an early start. This leads me to my tip for this article:

Though the mixing and baking of a cheesecake and crust takes a fair amount of time, probably 1.5-2 hours, it is nothing compared to the time that it has to sit and cool prior to being able to do anything with it. If you remove a cheesecake from a hot oven to cool, the drastic temperature fluctuation will cause it to crack and dry out. For this reason it is best to slightly undercook it, then turn the oven off, crack the door, and let the cavity of the oven come down to room temperature. Then remove the cheesecake and allow it to cool completely before covering and placing in a fridge to chill. This will take another 3-4 hours depending on the size of cheesecake. I would apply this technique with any custard. I took a couple of liberties with time on Wednesday night, particularly that the cheesecakes were still not completely room temperature when I covered them and put them in the fridge. Even with those liberties, I didn't get home until nearly 1 AM. To prep the cheesecakes for the display case I had to go back Thursday morning before I went to work. In all I was "baking" for approximately 6 hours. I know that as I become more adept and get systems down for everything that this I can reduce this time substantially.

Thursday, August 26, 2010

Getting There

We had the cafe. I could make the cheesecakes. Now what did we have to do to bring those together. Originally The Haven had an oven, but they found that due to its size it had to be vented in order to pass inspection The building we are in is 100 years old, mostly brick, 2 story and the kitchen area was somewhere in the middle of it. Therefore it would cost great gobs of cash in order to vent the large oven, so it had to go.

This left us with a problem. How do we make cheesecakes on-site? The answer was easy enough, get a small countertop convection oven. We found the largest size that we could have without having to vent and we bought it. But this presented another problem. I use nine inch spring form pans that are approximately three inches tall. The inner cavity of the oven had 3 racks (spaced somewhere between two and three inches), and was barely eighteen inches wide. I could fit two nine inch pans on one rack, but they would be touching each other and the sides of the oven which any baker knows is a big no-no. Plus, with three inch tall pans, I could only use two racks, one of which was needed for the water bath.

We checked out eight inch cake pans that were two inches tall, and I could fit four of them in the oven with a water bath, so that would be fine. The problem is that eight inch spring form pans apparently have to be ordered, and they come mostly in the three inch height. However we found some that are the right height and they have been ordered.

Another necessary item in making cheesecakes is a stand mixer. No problem, I have one of those... but wait, all kitchen equipment must be rated for commercial use! There are only a small handful of tabletop stand mixers that are commercial rated, and they are much, much cheaper when purchased through the internet. So the mixer is ordered.

We took ownership of The Haven on Saturday night. The Haven is closed on Sunday and we were to re-open Monday morning as The Haven Cafe with at least some of the changes in-place. One of those changes was the inclusion of cheesecake on the menu. Our shopping was done. We had the oven and the ingredients, but no pans and no mixer. Fortunately I had eight inch cake pans that I could use, and we were able to borrow a mixer to use until we could get our new one.

I had a lot of obstacles to overcome. Every baker can tell you that any change to any part of a recipe, even down to the equipment used in the process can create problems. I am used to baking cheesecake in my home oven, with nine inch spring form pans, and using my own mixer. Now I was baking in a new kitchen, with a small convection oven, cake pans, and a mixer I wasn't used to.

For my inaugural batch of cheesecake I chose to make Key Lime. Oh key lime. My wife Jan requested that I make key lime cheesecake one time for her friend's baby shower. No problem until she also requested that I make them green! I learned from Alton Brown that key lime is NOT green, and anything key lime that is green has had food coloring added, and there's just no reason for that. Though I was pretty adamant, in the end Jan won because the cheesecakes had to "match" the shower. Those cheesecakes came out the strangest shade of green that I had ever seen! This time there was NO food coloring involved.

My cheesecakes were in the oven. The water bath was bubbling away and everything was going well. I cleaned up and went out into the dining area to help out for a while as the cheesecakes baked. After maybe 20 minutes I went back in the kitchen and found that the cheesecakes had risen quite a bit! This is a problem, as it means that the oven is too hot and the liquid in the cheesecake is turning to steam. Steam around a cheesecake is good. Steam IN a cheesecake is bad! I turned the temperature down and let the cheesecakes finish cooking. Since these were in cake pans rather than spring form pans I had made a parchment paper "caddy" to lift them out when they had cooled. It worked fairly well, but the paper had folded over into the top of the cheesecakes, and this caused the tops and sides to be pretty uneven. Additionally one of the cheesecakes cracked! I wasn't very happy with my inaugural batch of cheesecake, but I had expected going into this that I would have problems. One of the cheesecakes was good enough to sell, and the one that cracked... well it could be used as samples!

I only had two eight inch cake pans, so I had to bring in a nine inch spring form pan in order to get one more cheesecake out before Monday morning. This was to be my signature flavor, vanilla bean. I stumbled on the idea for this recipe in an attempt to make a "Boston Cream" cheesecake and have loved it ever since. I now knew that the oven cooked hotter than my oven at home, due to the smaller cavity size and method of heating. Convection ovens use a fan to move the hot air around the oven rather than a regular oven that uses a flame or electric coil that radiates heat from the top or bottom of the oven. With the oven temperature set lower my vanilla bean cheesecake came out perfectly. The top was smooth and of a uniform color, and as far as I could tell the consistency was spot-on.

That is it for this entry. I go back into the kitchen tonight to add a new flavor to the menu and stock up the dessert case for the weekend.

I'll leave you with a tip. In this entry I mentioned the water bath. When making any type of custard, to help it cook evenly you have to use a water bath. Temperatures in an oven vary greatly, and since water never gets above the boiling point, whatever is in the water cooks more evenly. With my cheesecakes I struggled for many years and no matter what I did, from wrapping the base of the pan in foil to buying special "no leak" pans, I couldn't keep the water from seeping into the crust of the cheesecake! Finally I tried something new. Rather than put the cheesecake in the water bath, I put the pan of water on the rack under the cheesecake! This still filled the oven cavity with steam which helps not only in keeping the temperature even, but in keeping the top of the cheesecake moist. It probably isn't quite as good for the consistency of the cheesecake as a true water bath, but at least I don't have soggy crusts anymore!

In my next post I introduce a new flavor to the mix... and maybe add a photo or two!

Tuesday, August 24, 2010

The Beginning

I was maybe 12 years old. It was a warm summer night and I attended a family function for a friend of mine. His uncle made cheesecakes for the event. I remember helping to bring them in from the fridge in the garage, right next to the partially covered 1965 Ford Mustang that was in some state of restoration. As my favorite car of all time, it got a lot of my attention, and is probably why I can remember the event so well. Up to this time I had only ever had "restaurant" cheesecake which most of us know is typically made in a factory somewhere, frozen, and then shipped around the world until it ends up in the freezer at whatever restaurant wants it. These "factory" cheesecakes are typically dry and dense with the cream cheese flavor masked by whatever toppings and fillings they cover them in. This was different. This was soft, creamy and sweet, and it practically melted in my mouth. The tangy bite of cream cheese was there in force, and it accented the flavors that were added. This was what cheesecake was supposed to be, and this was the moment that I realized that I could make it myself.

I went home and immediately started looking through the family cookbooks to find a cheesecake recipe. I don't actually remember my first cheesecake, but I do remember one that was pretty much a disaster. This was my first attempt at a New York style cheesecake. These are thick, and typically use much more cream cheese and eggs than a regular cheesecake. I mixed it, baked it, let it cool, then after taking the side of the spring form pan off I spent a lot of time covering the sides in a layer of semi-sweet chocolate mini-chips. That night we had my cheesecake for dessert, and as I pulled the first slice of it out, the middle of the whole cheesecake oozed out onto the plate! I had undercooked it! My mom dutifully ate the outer edge that was cooked, but I had failed, and I wouldn't try even a bite. To this day I don't think I have attempted another "New York" style cheesecake.

Those first few years had cheesecakes that turned brown, cracked, and were dry and chalky, but each mistake led to the honing of my knowledge and techniques until I could produce a perfectly cooked cheesecake every time. No cracks, no browning, and above all the perfect internal consistency. I also tried many recipes, eventually settling on 2 "base" recipes that I have used exclusively for many years now. I can modify these recipes in an infinite number of ways to create any flavor of cheesecake that your taste buds desire.

Cheesecakes became my "thing." I often gave them as presents for Christmas, birthdays, etc... I would often get calls from friends and relatives; "could you make a cheesecake for the 4th of July BBQ?" Everyone seemed to like my cheesecakes, even my dad. And my dad doesn't like cheesecake! He's not the only one either. I've had several people tell me that they don't like cheesecake, but they like mine!

It is fall of 2009. My wife is a part-time event planner, and has been drafted by a family friend to plan the grand opening gala of The Haven, a new coffee shop that was to open nearby. They had the meal all planned out, and for the dessert they wanted my cheesecake, perhaps due to prodding from my wife. There were to be 70+ people. I had never made that many cheesecakes in such a short period of time. Over the period of a week I pushed out 1 or 2 vanilla bean custard cheesecakes a day until I hit my goal of 7 total. The gala went well and everyone seemed to enjoy the dessert. No more than a bite or 2 was left on any plate. The Haven even got a couple of people asking to buy my cheesecakes.

In the spring of 2010 we had the opportunity to buy into The Haven as part owners, and we took it!

August 21, 2010. The papers were signed, and our new partnership now owned The Haven. We will re-brand it The Haven Cafe, and we will get the word out that there are new owners, new management, fast and friendly service, and a new menu item... cheesecake.

This blog will document my experiences in crafting cheesecake for The Haven Cafe. I will share the ups and downs, politics, laws, and so many other things that have to happen just to be able to sell a slice of cheesecake. I will share tips and tricks for creating your own cheesecakes (sorry, no recipes.)

I hope you enjoy the blog, and please post comments positive or negative and let me know what you like, don't like, want to see, and so on.

I'll leave you with a simple cheesecake tip. If you use a hand mixer, look for one with plastic or plastic coated beaters. These will minimize air that is brought into the batter and help fight cracking. (when I was using a hand mixer I couldn't find any, but that was many years ago. I know that Target specifically has a model that comes with plastic beaters.)